The first step is to create a plastiline (modelling putty) base
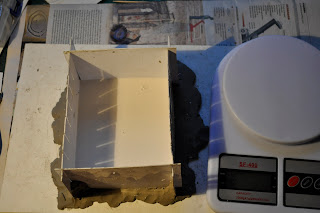
After I made a pla plates box that takes the Silicone.
To ensure it is leak-proof and none of silicone can flow out of the form, I use some modelling clay to seal it at the bottom.
Now I'm ready to do the first silicone casting.
Once the first half of the mold is created and dry, you need to apply a silicone separating cream ( I use an after shave cream with eucaliptus). This passage is assolutely necessary, so that the two halves of the mold won't stick together.
Be careful to apply this paste. If you don't cover all the silicone, the two pieces stick together and may ruin the whole mold and if you put it on the model, it may leave some cream on it, which will be visible in the actual cast.
Here the two molds. All the holes make it easier to later fit the two halves together, when casting.
After cleaning all the spures, I'm ready to use resin.
Here is the complete d pieces.
Resin is too much fragile, so be careful when you cut the pieces.
They looks perfect. Altough there are some minor bubbles that I'll fill with putty.
Here my casting after cleaning and sanding compared to the original one.


fantastic, thanke for posting your knowledge , bro
RispondiEliminaQuesto commento è stato eliminato dall'autore.
RispondiEliminaYou're welcome PeVi!!!
RispondiElimina